Happy Memorial Day everyone!
I have been loving the warmer weather and spending so much time outside with my little family. Besides overcoming a beginning of summer cold, {ah, all 4 of us!} we spent most of the weekend getting fresh air, visiting parks, planting our vegetable garden and watering our newly seeded lawn. {Thanks to my husband for taking on that HUGE job!} While we didn’t host anyone at our house this weekend, we did visit several friends and I, of course, could not attend empty handed. I made two different sweet treats and I am so excited to share these recipes with you.
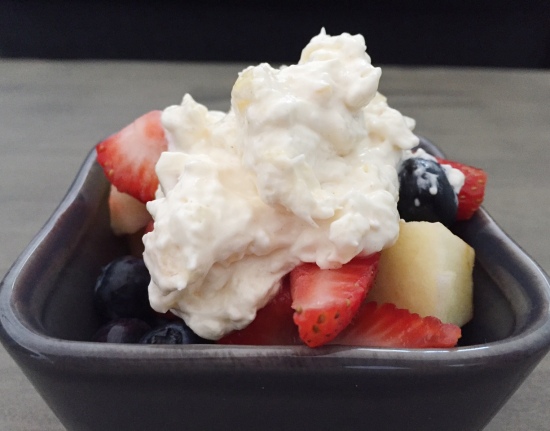
The first is a sweet dip that could be used as a topping for pretty much anything. I prefer to use this as a fruit dip, but it could also be used for bagels, angel food cake or the like. It’s super simple and uses a dressing from one of my favorite local lines, Sasha’s Salad & Sandwich Dressings. I first stumbled upon this local business at one of my favorite farmers markets several years ago. I was instantly impressed because the owners, a husband and wife duo, were always sampling in the most creative ways and handing out recipes that Kathy (the wife) created on her own. While I urge you to order online {Or drop by a local MKE Farmers Market or Sendik’s store) and try every flavor, be sure to pick up the Sweet Aloha so you can make this dip!

Sweet Aloha Dip

A fresh, chilled summer dip good for fruits, breads and cakes.
Credit: Sasha’s Salad & Sandwich Dressings
Ingredients
¼ cup Sweet Aloha dressing
8 oz brick Neufchâtel cheese
1 cup cool whip
½ cup crushed pineapple
1 tspn sweetener of your choice (sugar, stevia, etc.)
a dash of cinnamon
Directions
Whip all ingredients together and chill in refrigerator for 3 hours. Dip or spread as desired!
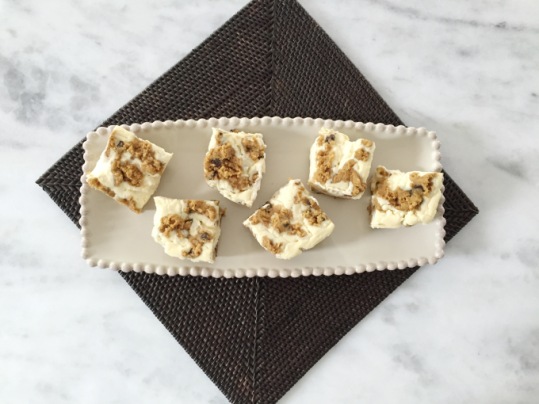
I’m also very excited to share this next recipe, as it was a little out of my cooking comfort zone to try. These Chocolate Chip Cheesecake Bars are a Trim Healthy Mama recipe created by a healthy baking goddess friend of mine. She is so-much-so, that this recipe went viral on Pinterest a few years back. If you’ve searched anything of Trim Healthy Mama, particularly on Pinterest, you’ve surely come across this sweet friend.

For those who are new to this, like me, Trim Healthy Mama is a diet that follows a few leading principles: (a) always separate your fats from carbohydrates while eating; (b) protein should be present in some form every time you eat; and (c) avoid sugar in all forms. I’m not the expert on this, just the messenger, so check some more details here if you’re interested. The cool thing is when you bake in T-H-M-form you are reducing the carbs and sugars you’d normally consume with sweet treats, i.e. healthier desserts! As I typically bake with traditional flour or wheat flour, these recipes call for a baking blend that is mostly comprised of oat fiber, coconut flour, almond flour, flaxseed and whey protein. I have found this to be very delicious and not compromising by any means. You can find the recipe below followed by some notes on my novice experience.
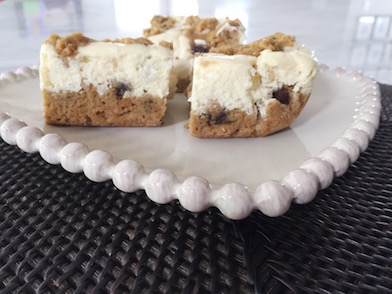
Trim Healthy Mama Chocolate Chip Cheesecake Bars (Version 2.0)

A Trim Healthy Mama cheesecake dessert to satisfy any sweet tooth.
Credit: Margeaux Vittoria via MargeauxVittoria.com
Ingredients
For the cookie layer:
- 1 1/2 cups Trim Healthy Mama Baking Blend
- 1/2 teaspoon baking soda
- 1/4 teaspoon salt
- 1/2 cup sugar-free chocolate chips
- 1/2 cup Pyure Stevia Blend or Gentle Sweet (use 1/3 cup if you have less of a sweet tooth)
- 1/2 cup extra virgin coconut oil, melted
- 4 eggs, beaten
- 1 tablespoon vanilla extract
For the cheesecake layer:
- Two 8 ounce packages neufchâtel (or 1/3 less fat) cream cheese, at room temperature
2 eggs - 1/3 cup Pyure Stevia Blend or Gentle Sweet (use 1/4 cup if you have less of a sweet tooth)
- 1/4 cup heavy cream
- 1/2 teaspoon vanilla extract
- Melted skinny chocolate, for serving (optional)
Directions
Preheat oven to 350º F and line an 8″ x 8″ pan with foil or parchment paper. Spray the foil or parchment paper generously with coconut oil baking spray, or simply wipe with coconut oil. Set aside.
Make the cookie layer:
In a large bowl, stir together all cookie ingredients until they form a stiff dough. Press 3/4 of the mixture across the bottom and up the sides of the prepared pan. The sides will reach about half way up the pan. Pre-bake bottom layer for 10 minutes.
Make the cheesecake layer:
While the bottom layer is pre-baking, use a stand or hand mixer to thoroughly beat together the cheesecake ingredients, scraping the sides of the bowl as necessary. Pour cheesecake mixture over pre-baked bottom layer. Use an offset spatula to level surface of cheesecake, then top with the remaining cookie dough. Use a sprinkling technique to form “clumps” of dough as top layer.
Bake bars at 350º F for 10 minutes, then reduce heat to 300º F and bake for 10-20 minutes longer. If the top is getting too brown cover with foil.
Cool bars in pan completely on a wire rack and then refrigerate, covered, for at least four hours (preferably overnight). Use foil or parchment as “handles” to remove bars from pan before serving. Cut into 16 squares and drizzle with melted skinny chocolate, if desired. Keep any leftovers well-wrapped in the refrigerator or freezer.
Here are my notes from testing this recipe:
- Truly use room temperature neufchâtel cheese. If you don’t, the cooking time will be off. I learned this from experience. Yes, I’m a novice when it comes to homemade cheesecake.
- Okay, so I wasn’t *completely* THM with this recipe. I only had semi-sweet chocolate chips on hand (not sugar free) so I used them. At least the rest of it followed the recipe! 🙂 Hershey’s, King Arthur & Lilys all make sugar free chocolate chips, but you could also buy an unsweetened chocolate bar from good ol’ Aldi and break it into chips yourself.
- I used a convection oven and still needed more baking time after adding the cheesecake filling and topping. I asked the creator herself what the consistency should be when taking the dish out of the oven and she replied, “set but slightly jiggly”. While this did make sense to me, I caution you that it should be much more set than jiggly and slightly golden in color. I wish I would have baked this a little longer because my center turned out a bit runny even after refrigerating the final product overnight.
- Taste testers unanimously approved!
- A few ingredients you may need: (Please note some of these are affiliate links and I may receive a small commission if you purchase. It goes toward taste testing!)
Both of these recipes would be great for the summer — enjoy them with family and friends. I hope ya’ll enjoyed your weekend! I know I sure did. More from me later this week…
XO
For more Wild-hearted recipes, check out Brunch with the Boettchers or perhaps you’d like to read more on my healthy living principles.